Rainstorms are always a good reason to stay home and spend all day with your loved ones. One of the many reasons why a storm can ruin your day is when water leaks out from your ceiling. There are many causes for this to happen. Foremost among them is a roof that has a few or many holes in it. While this is the most common reason, your chimney can also be a culprit to your water leak problems. If this is the case in your house, one chimney component you should check first is its flashing.
Basically, a flashing is pieces of sheet metal that connects the chimney to your house’s roof. 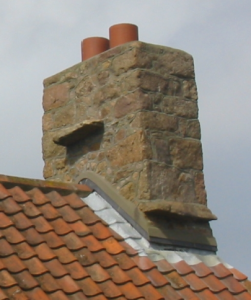 Apart from creating the aforementioned connection, the chimney flashing also prevents water and other harmful elements from entering your home. Although it should withstand all kinds of weather conditions, its lifespan can deteriorate as time passes by. When this happens, you should take some time off to remedy this problem before it can affect your residential living experience.
Before you start on the task itself, you will need to gather the necessary materials and tools to replace your old chimney flashing. First off, it is essential you obtain a large piece of sheet metal. Go for sheet metal with a 26 gauge and is prefabricated to ensure quality. Plus, you can have this piece of metal bent and customized according to the measurements of your chimney. Next, you will need Polyurethane caulk, roofing membrane, and a couple of roof brackets. When it comes to tools, you will need to obtain a ladder, cutting snips, a pencil, hammer, chisel, tape measure, a spirit level, and a grinder. Of course, don’t forget safety gear like gloves, eye goggles, and a roof harness.
Get rid of the old flashing in your chimney
Once you have determined your house’s chimney is causing trouble, you need to take it out right away. Set up your trusted ladder and use a roof harness to prevent any accident from occurring. Then, locate the chimney flashing and pry it out using a hammer and a chisel. Chip away at the roof cement that’s holding everything together until you have removed the defective flashing.
Customize the size of the base and step flashing
Now that you have cleared your chimney from its old flashing, you should take out your tape measure, pencil, and spirit level. You need to take the measurements of your chimney so you can cut accurately through the sheet metal you purchased.
Once you have those measurements, step down from your roof and cut the customized sheet metal using the snips. Make sure the metal is bent accurately at 45 degrees to ensure its durability. Afterwards, cut several other pieces of metal for the step flashing and saddle. Use your grinder to smoothen out the edges and make everything equal. Do remember to visualize how these separate pieces of metal will come together on your chimney so they will turn out alright.
Install the step flashing and chimney saddle
After cutting your sheet metal, you can now return to your roof to install them onto your chimney. First, lay down the base flashing on your chimney and seal it with some roofing membrane. Use your spirit level to keep your base flashing equal to the roof. Then, place the metal saddle and seal it with more roof membrane. Allow it to dry and you can move on to the next step.
Add step flashing on the base flashing
Now, get your tape measure and pencil to mark where you’re going to install the step flashing. Afterwards, attach it to the side of your chimney on the markings you made using roof membrane. Focus on how each step flashing overlaps with one another to ensure water won’t seep in through them. Complete the installation process by hammering down roofing nails on the base flashing to secure it.
Apply a coat of paint on your new chimney flashing
Once you have installed a new flashing to your chimney, it’s now time to make it more presentable. Get a primer and apply it on your chimney flashing to help the paint stick on it. Afterwards, apply the main coat of your chosen paint color and allow it to dry. When the paint has dried up, your chimney flashing installation work is now down.